Cobalt also contains a collection of Quick Menus to help you check important information at a glance. These are located in the top-right hand corner of the screen and are represented by the following Icons:

Help Icon
Opens the Cobalt Help site in a new browser tab

Settings Icon
Opens the Settings Quick Menu

Notifications Icon
Opens the Notifications Quick Menu
Help
Selecting the Help Icon will open up the Cobalt Help site in a new tab in your web browser. All unsaved changes on the main Cobalt site will remain.
Settings
Selecting the Settings Icon will open a Quick Menu with some basic settings options for your Account:
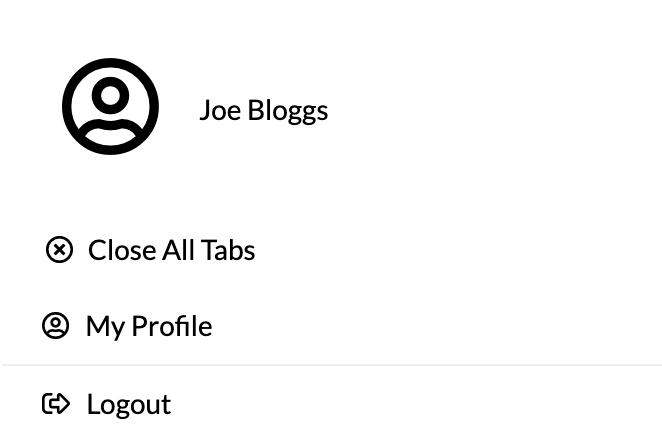
Selecting the Close All Tabs option will close all of your open Tabs on your behalf, saving you the hassle of going to each Tab and closing it individually. You can find out more information about this option by reading the previous article.
Selecting the My Profile option will open a new Tab containing the Settings page for your own User Account (covered in a later topic) HYPERLINK TO SETTINGS USERS TO GO HERE.
Selecting the Logout will log you out of Cobalt, allowing you to log back in as a different User or access a different Organisation.
Notifications
Selecting the Notifications Icon will open a Quick Menu with two contained sub-menus, represented by the following Icons:

Reminders Icon
Opens the Reminders section of the Notifications Quick Menu

Ticket Work List Icon
Opens the Ticket Work List section of the Notifications Quick Menu
Reminders
Selecting the Reminders Icon will open the section for Reminders which you, or a Group you are a part of, has been assigned to:

At the top of each Reminder, you will see the name of the Account to which the Reminder is attached. Using this, you can attach a Reminder for you to contact the customer regarding a pending payment, for example.
Just below that are three annotation which represent key information about this Reminder. From left-to-right, they represent the following:
- The Priority assigned to the Reminder (in this case, Medium)
- The facility which was used to created the Reminder (in this case, a Note)
- The part of the system to which the Reminder belongs (in this case, an Order)
You can jump directly to the facility which created the Reminder or the part of the system to which the Reminder belongs just by clicking its annotation.
Below that, you can easily see how you have been assigned to the Reminder by reading the three assignment annotations. From left-to-right, they represent the following:
- The Company which the Reminder is assigned to (in this case, Example Inc).
- The Group which the Reminder is assigned to (in this case, Customer Support).
- The User which the Reminder is assigned to (in this case, All Users).
Through this information, we can determine that our Account is assigned to this Reminder because we’re part of the Example Inc Company and a member of the Customer Support Group. All other members of this Group will also see this Reminder in their Reminders section.
Below that is the content of the Reminder, which should let you know of an action which needs to be performed before the Reminder can be marked as complete.
In the bottom-right of the Reminder is the Date/Time at which it is due. Once this has been reached, the Reminders Icon in the top-left hand corner of the Reminder which change to a gold colour:
To mark a Reminder as completed, check the box in the top-right. Note that this will dismiss the Reminder from this list.
To learn more about Reminders, read the Reminders article. HYPERLINK TO REMINDERS ARTICLE TO GO HERE
Ticket Work List
Selecting the Ticket Work List Icon will open the section for Tickets which you have put into your Ticket Work List:
At the top of each Ticket, you will see the system-defined Ticket Number, followed immediately by the Account which the Ticket has been assigned to.
Just below that is the title of the Ticket, which gives a brief explanation of the subject matter of the Ticket.
Below that, you can see the status of the Ticket by reading the two / three annotations. From left-to-right, they represent the following:
- The New state of the Ticket, representing if the Ticket has recently been added to the Ticket Work List (note that this does not appear if the Ticket has been present in the Ticket Work List for some time).
- The Queue which the Ticket has been assigned to (in this case, Service Desk).
- The Priority of the Ticket, which offers an indication of in which order Tickets should be managed (in this case, Low).
Below is the Time Entry clock for the Ticket, which allows you to record how long you have worked on each Ticket. The Time Entry clock features three buttons with icons, from left-to-right they represent the following:

Start Button
Start the Time Entry clock (not shown if clock is running).

Pause Button
Pause the Time Entry clock (not shown if clock isn’t running).

Record Time Entry Button
Record the current Time Entry clock value as a Time Entry against the Ticket.

Stop Button
Stop the Time Entry clock and remove any accumulated time.
Using the Start, Pause and Stop buttons will start, pause and stop the Time Entry clock (respectively). Using the Record Time Entry button will allow you to record a Time Entry against the Ticket. HYPERLINK TO TICKET TIME ENTRY TO GO HERE
Clicking the red X in the top-right hand corner of the Ticket will remove it from your Ticket Work List.
To learn more about Tickets, read the Tickets article. HYPERLINK TO TICKETS ARTICLE TO GO HERE